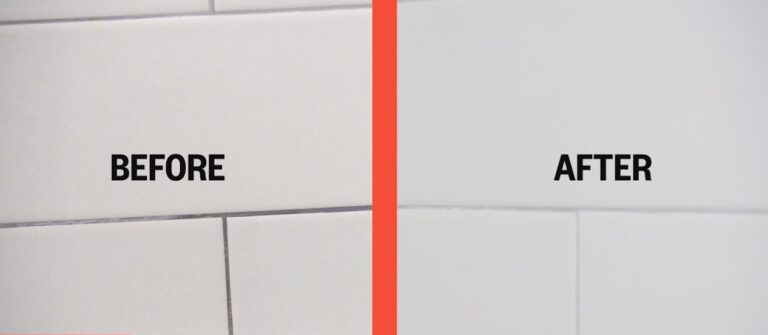
Clean tub grout can make a huge difference in the overall appearance of your bathroom. Unfortunately, grout tends to attract mold, mildew, and grime, making your sparkling bathtub look dull and neglected over time. Regular grout maintenance may seem tedious, but the payoff is worth it—a healthier, cleaner bathroom and fewer costly repairs down the road.
This guide will help homeowners, DIY enthusiasts, and even cleaning professionals understand how to clean tub grout efficiently and effectively. Follow these simple, actionable steps to tackle stubborn stains and restore your grout to its original brilliance.
How to Clean Tub Grout in 6 Simple Steps
When it comes to grout cleaning, having the right tools and techniques in your arsenal makes all the difference. Below, we’ll outline a step-by-step approach to restore your grout’s shine.
1. Gather Your Cleaning Supplies
For optimal results, you’ll need a few tools and products to get started. Most of these items are readily available at local stores or online. Here’s a list of essentials:
- Soft-bristle Brush or Grout Brush (avoid stiff bristles as they may damage grout)
- Baking Soda and White Vinegar
- Hydrogen Peroxide
- Spray Bottle
- Dish Soap
- Old Toothbrush (for tight spaces or delicate areas)
- Small Bucket or Bowl
- Microfiber Cloths
If you’re dealing with severe stains, consider investing in commercial grout cleaning products or an oxygen bleach cleaner.
2. Start with a Basic Cleaning Solution
Before getting into heavy-duty solutions, try cleaning your grout with a simple mix:
- Mix ½ cup of baking soda with water to form a thick paste.
- Apply the paste directly to the grout lines using your brush or an old toothbrush.
- Use a gentle scrubbing motion to loosen dirt.
- Rinse the area with warm water and wipe it clean with a microfiber cloth.
This basic solution works wonders for light stains.
3. Tackle Stubborn Stains with Vinegar and Baking Soda
If stains persist, it’s time to bring out the heavy hitters. Here’s how to clean grout using vinegar, a natural and effective cleaner:
- Sprinkle baking soda onto the grout lines.
- Fill a spray bottle with equal parts white vinegar and water, and spray the mixture onto the baking soda.
- Allow this to sit and fizz for 5-10 minutes.
- Scrub the grout thoroughly with your brush before rinsing.
Pro Tip: While vinegar works well for ceramic or porcelain tiles, avoid using it on natural stone tiles, as the acidity may damage the surface.
4. Disinfect with Hydrogen Peroxide
Hydrogen peroxide is a fantastic option to target bacteria, mold, and mildew. After cleaning the grout with the methods above, apply hydrogen peroxide directly to the problem areas:
- Use a spray bottle or a cotton ball to apply hydrogen peroxide.
- Allow it to dry naturally for 10-15 minutes.
- Gently scrub the grout lines to remove any lingering stains.
This step leaves your bathroom grout sanitized and refreshed.
5. Use a Commercial Grout Cleaner for Stubborn Mold
If home remedies don’t completely clear tough stains, a commercial grout cleaner can be your best friend. Look for cleaners containing oxygen bleach, as this ingredient is highly effective on mold and mildew.
Follow the product instructions carefully, and always test the cleaner on a small, inconspicuous tile area to avoid potential damage.
6. Seal Your Grout for Long-lasting Results
Once your grout is sparkling clean, seal the results with a protective grout sealer. A grout sealer helps reduce water absorption and prevents stains from setting in again.
- Ensure the grout is completely dry before applying the sealer.
- Apply grout sealant using a brush-on applicator pen or sponge, and wipe away excess with a microfiber cloth.
- Reapply the sealer every 6-12 months for ongoing grout protection.
Tips for Maintaining Clean Grout
Once you’ve cleaned grout thoroughly, maintaining its cleanliness becomes significantly easier. Here are useful tips to keep it looking fresh:
- Use Ventilation: Run a fan or open a window after baths or showers to reduce moisture in the air.
- Wipe Tiles Regularly: Use a squeegee or microfiber cloth to minimize water accumulation on tiles and grout lines.
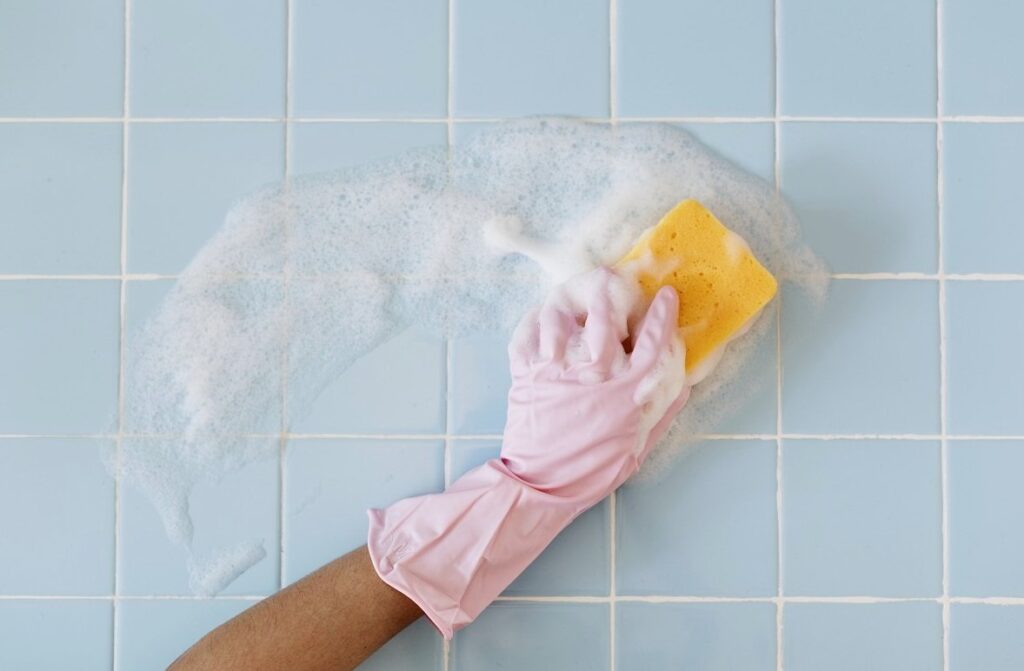
- Implement a Weekly Cleaning Routine: Clean grout lightly using dish soap and water to prevent dirt build-up.
- Minimize Soap Scum: Switch to liquid shower gel instead of bar soap to reduce soap residue.
Being proactive about maintenance can save you hours of scrubbing in the future.
When to Call in the Professionals
While DIY grout cleaning is effective for most situations, there are times when a professional is necessary:
- Persistent stains that resist all cleaning attempts
- Mold infestation that spreads beyond the grout lines
- Grout that is cracked, crumbling, or missing altogether
Professional grout cleaning or regrouting services can restore even the most neglected grout to a like-new state.
Take Control of Your Bathroom’s Look
Cleaning tub grout doesn’t have to be a dreaded chore. By following the steps outlined above and implementing regular maintenance habits, you can ensure your bathroom remains clean, healthy, and inviting.