Grout plays a crucial role in maintaining the structural integrity and look of tiled surfaces. But if it’s unsealed, it can become a magnet for dirt, grime, and stains. Over time, this not only diminishes the appearance of your home but can also lead to potential health concerns, such as mold and mildew growth.
Wondering how to tackle the challenge of cleaning unsealed grout? This guide will walk you through what unsealed grout is, why it requires specific care, and how to restore it to its former glory with the best cleaning practices.
Whether you’re a homeowner, a DIY enthusiast, or a cleaning professional, by the end of this post, you’ll have actionable steps to ensure that your grout stays clean and protected.
What is Unsealed Grout?
Unsealed grout is simply grout that hasn’t been treated with a protective sealant. Grout is typically a porous material made of a mix of cement, sand, and water that is used to fill the spaces between tiles. Its porous nature allows it to absorb liquids, dirt, and stains easily when not sealed, making it much harder to clean and maintain.
Common issues with unsealed grout include
- Staining: Because it absorbs spills and grime, grout is prone to discoloration over time.
- Mold and Mildew Growth: Dirt coupled with moisture creates the perfect environment for mold and mildew to thrive.
- Weakening Structure: Unsealed grout can degrade faster with prolonged exposure to moisture and heavy wear.
Understanding this sets the stage for why it’s important to clean and maintain unsealed grout properly.
Why Cleaning Unsealed Grout is Important
Unsealed grout may not seem like a critical concern, but its condition can impact both the appearance and health of your home.
1. It Enhances Your Home’s Visual Appeal
Dirty or stained grout can make even the most beautiful tile work look unkempt and aged. Clean grout acts as a finishing touch, ensuring that your space appears polished and well-maintained.
2. Prevents Health Issues
Mold and mildew trapped in unsealed grout can release spores into the air, potentially impacting the respiratory health of those in your household. Keeping grout clean and preventing moisture buildup mitigates these risks.
3. Prolongs Grout Longevity
Cleaning and maintaining your grout can prevent premature wear and costly repairs. A little care goes a long way in extending the life of your tiled surfaces.
Step-by-Step Guide to Cleaning Unsealed Grout
While cleaning unsealed grout can initially seem daunting, it’s completely manageable with the right tools, cleaning agents, and methods.
1. Gather Your Tools and Supplies
Before you begin, make sure you have all the necessary items. Here’s what you’ll need for the job:
- Soft-bristled brush or a grout brush (avoid hard-bristled brushes that might damage the grout)
- Mild detergent, like dish soap
- Vinegar or baking soda for natural cleaning alternatives
- A pH-balanced grout cleaner (for tougher stains)
- A microfiber cloth or sponge
- A spray bottle for DIY solutions
- Warm water
2. Start with a Gentle Clean
- Mix warm water and a few drops of mild detergent in a spray bottle.
- Spray the mixture over the grout lines and allow it to sit for 5-10 minutes.
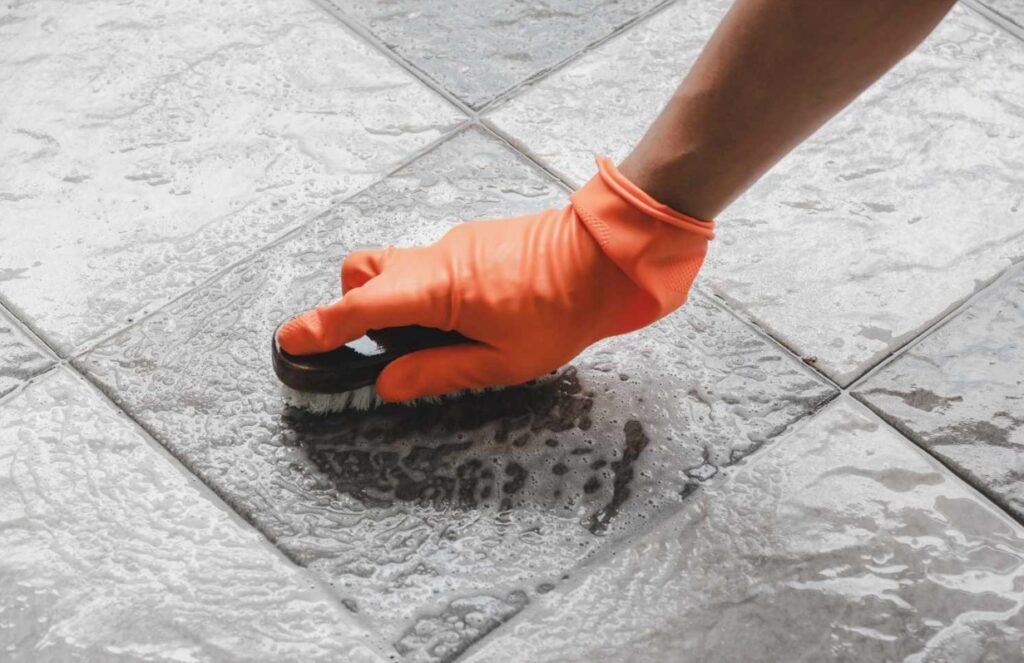
- Use the grout brush to scrub in a small circular motion, focusing on dirtier areas.
- Wipe the surface clean with a damp microfiber cloth.
3. Try Natural Cleaning Alternatives for Stubborn Stains
For tougher stains, vinegar or baking soda can be effective and environmentally friendly options.
- Baking Soda Paste: Mix baking soda and water to form a thick paste. Apply the paste to the grout lines, scrub with a grout brush, then rinse with warm water.
- Vinegar Solution: Mix equal parts of white vinegar and water in a spray bottle. Apply to stained areas, allow to sit for a few minutes, and scrub gently. (Note: Avoid vinegar for marble or natural stone tiles as it can damage the surface.)
4. Use a Commercial Grout Cleaner for Intense Stains
If natural methods don’t work, opt for a commercial pH-balanced grout cleaner. Follow the manufacturer’s instructions carefully, and always perform a spot test on a small, inconspicuous area first to ensure it won’t damage your tiles or grout.
5. Rinse Thoroughly
After scrubbing, make sure to rinse your grout lines with warm water to remove any residue from cleaning agents. Failing to rinse properly can leave behind a film that attracts additional dirt.
6. Dry Completely
Finally, dry the area thoroughly with a clean microfiber cloth to prevent moisture retention, which can lead to mold growth.
Preventing Dirt Buildup and Protecting Your Grout
Even with the perfect cleaning routine, preventing grime buildup is the best long-term solution. Here’s how you can maintain clean and fresh grout for years to come.
1. Adopt Daily Habits
- Wipe down tiled surfaces regularly to prevent grime and soap scum buildup.
- Use a daily shower spray in bathrooms to reduce moisture.
2. Schedule Regular Cleaning
Set a monthly reminder for deep cleaning your grout to avoid letting dirt settle long-term.
3. Seal Your Grout
Once your grout is thoroughly cleaned and dried, applying a high-quality grout sealer is crucial.
- Sealed grout repels moisture, dirt, and stains, making it much easier to clean in the future.
- Reapply the sealant every 6-12 months, depending on how often the area is used.
4. Use Mats or Rugs in High-Traffic Areas
Place rugs near entryways, kitchens, and bathrooms to prevent dirt and moisture from tracking onto tiled surfaces.
Why Clean Grout Matters
Keeping unsealed grout clean isn’t just about aesthetics—it’s about creating a healthier, more enjoyable home environment. By following these methods, you can restore the beauty of your tiled spaces, minimize health risks, and prolong the life of your grout.
Whether you’re tackling your first grout-cleaning project or advising clients as a cleaning professional, these tips are designed to make the process as seamless and effective as possible.

