Ever notice that one wall in your house that always feels like an ice brick, even when the heating is on? Cold interior walls aren’t just uncomfortable—they can lead to higher energy bills and even issues like mold and dampness. The good news? With the right techniques, you can tackle this problem head-on by insulating the wall from the inside. Once the wall is insulated, here is how to limewash a wall.
Understanding the Science Behind Cold Walls
Before you can fix the problem, it’s important to understand why your walls get cold in the first place.
The Role of Heat Transfer
Cold walls result from heat escaping through the wall (a process known as heat transfer). When your wall lacks proper insulation, heat flows from the warmer inside to the colder outside, leaving the wall—and your room—chilly.
How Insulation Works
Insulation acts as a barrier, reducing heat transfer and helping to maintain a consistent indoor temperature. By adding insulation inside your wall, you can prevent heat from escaping and keep the cold at bay.
Types of Insulation
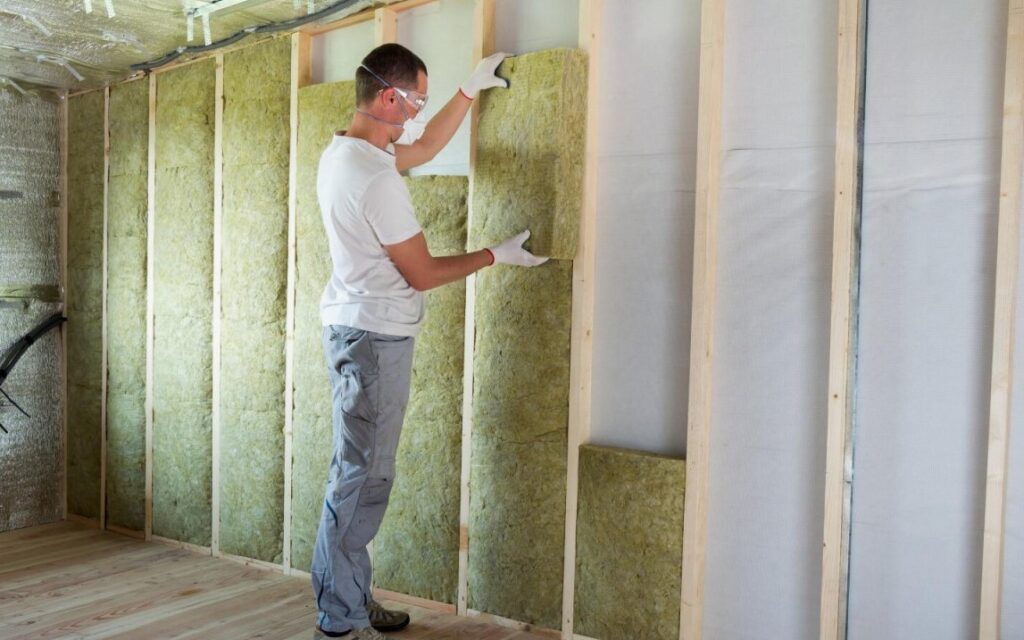
- Batt Insulation: Pre-cut fiberglass or mineral wool panels designed for easy installation.
- Blown-in Insulation: Loose-fill insulation materials like cellulose, sprayed into walls.
- Rigid Foam Boards: Solid panels made from foam, ideal for slim walls.
- Spray Foam Insulation: Expands to fill gaps and cracks, creating an airtight seal.
Each type has its strengths depending on the wall’s material and the level of insulation needed.
Diagnosing the Problem
It’s crucial to figure out exactly where your wall’s weaknesses lie. Here’s how to pinpoint cold spots and air leaks.
Tools You’ll Need
- Infrared Thermometer: Measure surface temperatures to find unusually cold areas.
- Smoke Pencil or Incense Stick: Identify drafts by observing the smoke’s movement.
- Moisture Meter: Check for dampness, as this may indicate a water infiltration problem that needs addressing before adding insulation.
Steps to Assess Your Walls
- Walk around your home and feel for walls that consistently feel colder.
- Use an infrared thermometer to locate temperature differences.
- Test for drafts near windows, outlets, and along skirting boards.
Preparing for Insulation
Preparation is key to a safe and seamless insulation process.
Safety First
- Wear gloves, goggles, and a dust mask, as insulation materials can irritate the skin and lungs.
- Ensure proper ventilation in your workspace.
Gather Your Tools
- Utility knife for cutting insulation.
- Measuring tape for accurate dimensions.
- Adhesive or fasteners depending on your chosen insulation material.
- Drop cloths or plastic sheeting to protect floors and furniture.
Pre-Insulation Steps
- Clear the Wall: Remove furniture, artwork, and fixtures.
- Fix Underlying Issues: Address dampness or cracks before proceeding with insulation.
- Clean the Surface: Wipe the wall clean to ensure insulation materials adhere properly.
Different Insulation Methods
Not sure which material is best for your cold wall? Here’s a quick breakdown of popular DIY-friendly options.
Batt Insulation
- Best For: Straightforward walls with minimal obstructions.
- Pros: Easy to install and widely available.
- Cons: Less effective in tight or irregular spaces.
Blown-in Insulation
- Best For: Walls with small, enclosed cavities.
- Pros: Fills gaps evenly.
- Cons: Requires special equipment for installation.
Rigid Foam Boards
- Best For: Large, flat walls.
- Pros: Thin but highly effective.
- Cons: Harder to cut and shape.
Spray Foam Insulation
- Best For: Walls with numerous cracks and crevices.
- Pros: Creates a complete airtight seal.
- Cons: Typically more expensive.
Step-by-Step Guide to Insulating a Cold Wall
Now it’s time to get to work! Follow these steps tailored to your preferred insulation method.
Using Batt Insulation
Measure your wall’s dimensions and cut the batt insulation accordingly.
Place the insulation snugly between the studs without compressing it.
Use fasteners or adhesives to keep it in place.
Cover with a vapor barrier to prevent moisture.
Using Foam Boards
Measure and cut the foam boards to fit your wall.
Apply adhesive to the back of the panels.
Press the boards firmly against the wall to fix them in place.
Seal the edges with tape to enhance airtightness.
Using Spray Foam
Shake the spray foam canister to activate the solution.
Hold the nozzle close to the area you’re insulating and spray evenly.
Allow the foam to expand and cure per the manufacturer’s instructions.
Post-Insulation Checks and Improvements
Once the insulation is installed, ensure its effectiveness with these post-installation checks.
Test the Results
- Use an infrared thermometer to check that the wall’s temperature matches the rest of the room.
- Feel for any residual drafts or cold spots.
Enhance Energy Efficiency
- Seal window edges or outlet gaps with caulk.
- Consider adding thermal curtains for added insulation.
Benefits of Insulating a Cold Wall
Here’s what you’ll enjoy after insulating your walls:
- Energy Savings: Lower heating bills thanks to improved heat retention.
- Enhanced Comfort: Rooms stay warmer, even in the dead of winter.
- Reduced Moisture Risks: Better-insulated walls are less prone to condensation and dampness.
- Eco-Friendliness: Reduced energy consumption helps lower your home’s carbon footprint.
Take Action and Transform Your Walls
Insulating a cold wall from the inside isn’t just a fix—it’s an upgrade. By taking the time to diagnose, prepare, and insulate correctly, you can create a more comfortable, energy-efficient home while potentially increasing its value. If you have ants in your home, here is how to get rid of ants in walls.